A primer for authors and editors. As search engines adapt their algorithms to put even more emphasis on mobile device performance, it’s a good time to brush up on some effective practices for keeping your WordPress pages humming along at top speed. Some of the biggest influencers of page-load speed are your media resources, especially images, which is why we’ve put together this guide to help you optimize your images on WordPress.
Why We Optimize Images
Reason 1: Original Photos are Way Too Big
Every time you load a webpage, your browser downloads dozens, sometimes hundreds of files from the web server. Sometimes these requests are for really small files like HTML, JavaScript or CSS files, and sometimes these requests are for huge files like music or videos. However images will comprise the bulk (sizewise) of almost any page load. Even though images are normally much smaller than video files, your average home page may have dozens of them, and they really add up.
A default-settings photo taken with a smartphone like the iPhone X is about 6 MB per file. A professional DSLR camera like the Canon D6 will produce image files of a whopping 15-20MB (or more!) each.
To put that in perspective, the largest, full-width images on this site are only about 0.15 MB (about 1% the size of the original image), which is more than enough to display beautifully on any device.
Reason 2: WordPress and Your Themes May Not Optimize Images for You
You may be thinking, “doesn’t WordPress crop and optimize my images for me?” Think again.
While WordPress as well as your theme may automatically crop images when you upload them, but it doesn’t compress or optimize them, and whether those cropped images make it onto your final page is another matter altogether. We will discuss this point a little later.
In addition, some of the most popular drag-and-drop page builder themes, like Divi or Extra, don’t allow you to select these pre-cropped images from the builder. They always force using the original “full-size” image.
Reason 3: Your Plugins Have Limits
For those who are thinking “I have a plugin that does that,” it’s good to remember that a plugin only works within certain limits.
The two most popular plugins for image optimization are Smush and Compress JPG & PNG Images. Recognize that these plugins have limits unless you pay for the costly full versions. The free version of Smush doesn’t compress your full-size images at all and won’t compress any image over 1.0 MB (so say goodbye to compressing any original image shot on a smartphone or better). Compress JPG & PNG images doesn’t have file size limits but restricts the total number of image compressions you can run per month, which can be really restrictive if you’re building a new website with dozens of images.
How to Optimize Images for WordPress
There are a number of ideas out there on the best process for preparing images for use with WordPress. However, we’ve found that a simple, four-step process works best and is easy to teach to others.
Before Uploading
Some of the most important steps in the process occur before you ever upload your images to the server.
Step 1: Consider Where and How the Image will Appear
Like any good process, before getting technical, “thinking” is a good place to start.
- Where is this image going to show up? If it will only appear in the sidebar, maybe you only need to export a JPG file that is 400px wide.
- Will you have have an overlay of text or textures? If you have textures or a color-overlay, chances are the image won’t be clearly visible anyways, which means in the next step, you can drop the size and output quality to decrease the file size and shave some weight off your page-load.
- Will it be a small icon that is repeated several times? If the file is an icon with simple colors or a transparent background, maybe a PNG file or an 8-bit PNG file will get the job done better than a jpg.
- If your theme is cropping the image for you, what will be the final aspect ratio/dimensions of the image? If every time the image appears, your theme is cropping it down to a square, there’s no reason to upload a rectangular image. You can crop the photo in advance, which removes the guesswork about how the automatic software will crop the image.
- What will happen to the image on mobile devices? While an image may appear one way for desktops, an image may have a totally different width once your website adapts to the mobile view. Think through, “for what device will this image be the widest?” The answer may not always be desktops, especially if you have a multi-column layout that collapses to a single column for tablets. You’ll want to make sure you export an image big enough so that it doesn’t become stretched and pixelated on different screen sizes.
Step 2: Save for Web / Export for Web
For this stage, you will need software. We use Adobe Photoshop or Illustrator, but if you have budget constraints, you could also use Adobe Photoshop Elements, a free solution like GIMP or literally hundreds of online options (ask Google).
Based on needs discovered in Step 1, crop your image.
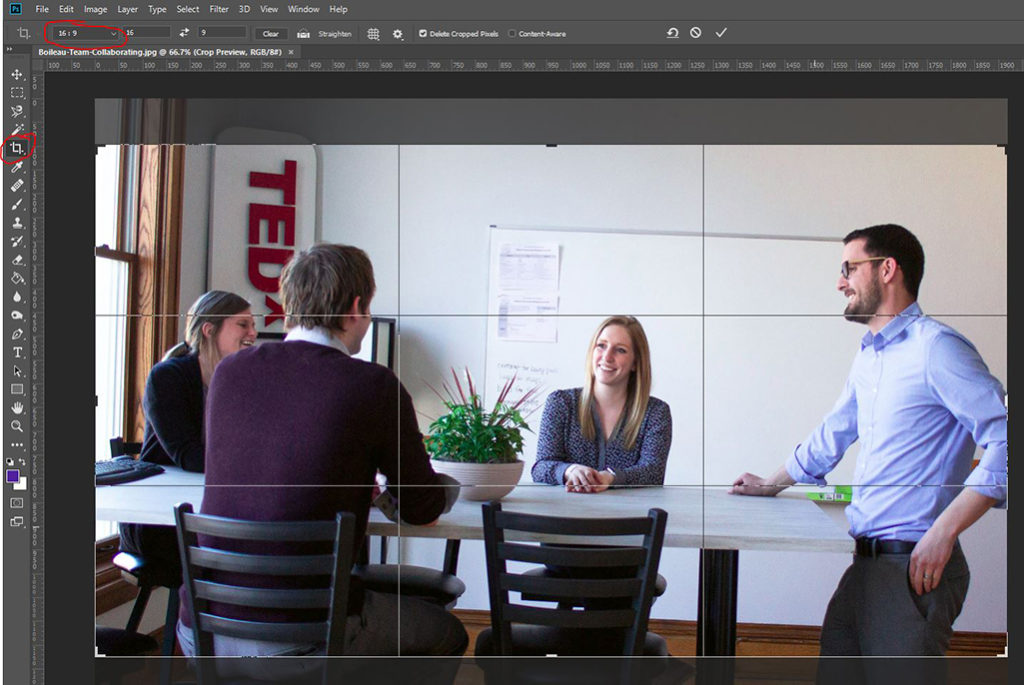
If you don’t know what to crop to, it’s a safe bet to go with a 16:9 aspect ratio, which will look nice in most contexts. You can use 4:3 or 1:1 if you’re looking for something a little taller.
Then export for web.

This is probably the most complicated step of the process. You’ll want to consider what you learned in Step 1 to choose an appropriate image width and quality. Since every website is different, I can’t tell you exactly what you should export, but here are some basic “rules of thumb” you can fall back on if you’re unsure:
- Huge, High-Quality Images: JPG, 1920px wide @ 60% quality. These images will show up nicely edge-to-edge even on newer desktops.
- Large Background Images: JPG, 1366px wide @ 40% quality. Images that will be used as backgrounds or have overlays don’t need to be as high quality because they’re less noticeable.
- Large Images: JPG, 1024px wide @ 60% quality. Used for content-width images.
- Medium Images: JPG, 768px wide @ 60% quality. Used for column-width images on 2 or 3-column layouts.
- Icons: PNG or PNG-8 (depends on how they look when you export). Should be exported at exactly the size they will appear. Scaling png icons will make them look fuzzy, especially if they have transparent backgrounds. If you’re feeling really bold, you can export from illustrator to SVG vector format, but browser compatibility is a bit inconsistent.
Use TinyPNG (Optional)

Optionally for PNG images you may be using as icons, graphics with transparent background, or repeating background images, you can run them through TinyPNG, which will crush them down to a super-tiny size!
After Uploading
After uploading, you can take a few additional measures to ensure you’re using the most optimized images in the right places.
Step 3: Plugins
A little earlier I mentioned Smush and Compress JPG & PNG Images, which while limited in some regards, are two great plugins for taking your image compression to the next level.
Whenever you upload an image to WordPress, the system automatically creates a number of cropped versions of your image (at least three: thumbnail, medium and large, as well as any image sizes registered by your theme, which could be over a dozen). While the full-size image you upload to WordPress is already optimized, these plugins will automatically handle optimization for all of these newly cropped images as well.

Both plugins offer features to bulk-optimize past image uploads, which can help you catch up if you’ve been blogging for a long time.
Step 4: Choosing Images
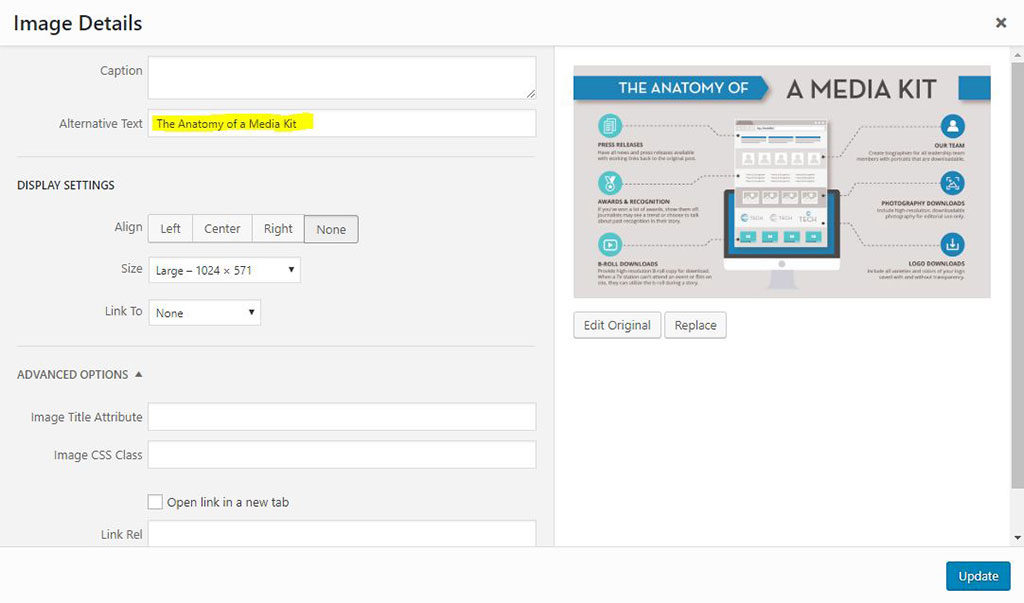
Now that you have an awesome, super-compressed, appropriately sized (and hopefully alt-tagged) image, let’s make sure that you actually are using the right one.
When using a page builder, adjusting theme settings or inserting a featured image, often times you won’t have a choice for image size–the theme will select it for you automatically.
However, if you’re inserting images using a compatible page builder like Gutenberg or the classic WordPress editor, you’ll always be presented a choice on which image to insert.
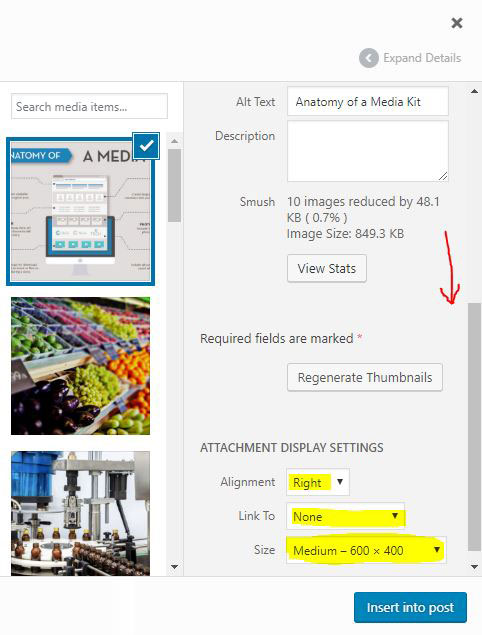
Make sure you scroll down to the Attachment Display Settings where you can choose which size image is appropriate. If you did all that work to crop and size your image, don’t accidentally put in an image that is too small or oddly cropped!
Shameless Plug
If you don’t have the right tools or just would prefer to leave your website technology in the hands of experts, let’s talk. Let us buy you
Pro Tips
That’s all there is to it!
But we do want to leave you with a couple of “pro tips” so you don’t miss out on some other search engine optimizations while you’re working on your images.
1. Use short but descriptive image titles.
For example, IMG_098x.jpg is bad because it gives us no idea what the image contains, whereas what-is-a-media-kit.jpg is good because it’s descriptive and understandable by search engines.
2. Use good alt tags.
Google can’t (or doesn’t) read the content of your image, so providing an Alt Tag using WordPress’ UI will help Google understand what your images are and improve search ranking.